Anyone into gardening, whether as a hobby or part of the job, knows how important a garden hose is for regularly watering your plants. A leak in the hose pipe is enough to make your gardening experience awful.
However, there is no need to call a professional for this job if you know how to fix leaking garden hose connector by yourself. This saves your time and also saves some extra bucks from your gardening budget.
In this article, we have put together some pro tips for fixing a leaking garden hose with some easy-to-find tools. You will also know about the main reasons for leaking hose pipes so that preventing it becomes easier.
Navigate Quickly
Why Does Garden Hose Connector Leak?
A leaky hose pipe wastes a huge amount of water if not repaired quickly. Water will keep dripping all day long untill you fix that leak. If you know the reasons behind this leakage, it becomes easy for you to act quickly and take the necessary steps to stop that leaking.
The following reasons are the most common ones behind leaking connectors.
Loose Fitting of the Connectors
Often the connectors become loose-fitted after being used for a long time. Otherwise, it can happen due to the water pressure or some other issues. Besides, the gaskets can wear out or might get missing, which hugely affects the connectors.
Gaskets are made of rubber and work great for sealing any connecting point of two surfaces. They are necessary for preventing leaks from hose connectors.
Loose Packing Nut of the Faucet
If you notice your garden hose pipe properly, you will see a faucet attaching to the connectors with a packing nut. Faucets are used to connect the hose pipe to the water source. When the nut connecting the faucet is not tight enough, the faucet might leak.
Worn Out Hose End Fittings
The hose end fittings often wear out and cause leaks in the hose connector. This generally happens because of temperature fluctuations during the cold season and the summer. In winter, water on the pipe often freezes, and the increased volume puts pressure on the inner surface, affecting the hose end fittings.
Fixing a Leaky Hose Connector
Generally, we use hose connectors to connect a hose with the water source or attach any extra nozzles. If you notice a leak in the connectors, don’t just discard them to buy a new one because it is super easy to fix them at home without hiring any professionals.
Here, we are discussing some easy steps of repairing a hose connector for three different scenarios.
Nozzle Leak
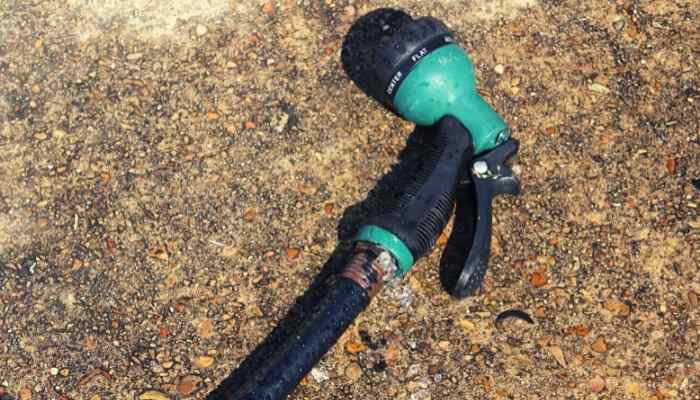
Among the connections of a hose pipe, nozzles are often seen leaking due to loose fitted or worn-out connectors which are attached to it. If you notice such a leak, follow these procedures to fix that.
Essential Tools
- A flathead screwdriver
- Plumber tape/Teflon tape
- Hose washer
- A utility knife
Procedures
- Separate the nozzle that is attached to the hose pipe to check the leaking spot.
- Notice where the threads are connected so that you can understand whether there is any problem with the rubber washer or not.
- If the rubber washer is the one having issues, replacing the entire nozzle is the best decision. Because fixing the rubber washer is a tough job, and sometimes it can’t be fixed.
- But in case the threads are all right, clean the ends with a hose washer. You can also use a utility knife to remove any kind of debris stuck there.
- Use plumber tape or Teflon tape to fill the space between the threads.
- If you replace the washer, attach it to the base of the nozzle so that it remains at the bottom of the threads.
- Use a flathead screwdriver to tighten the fitting to make sure it doesn’t leak.
- Now the repairing is done, and you can test whether the nozzle is working perfectly or not.
Faucet Leak
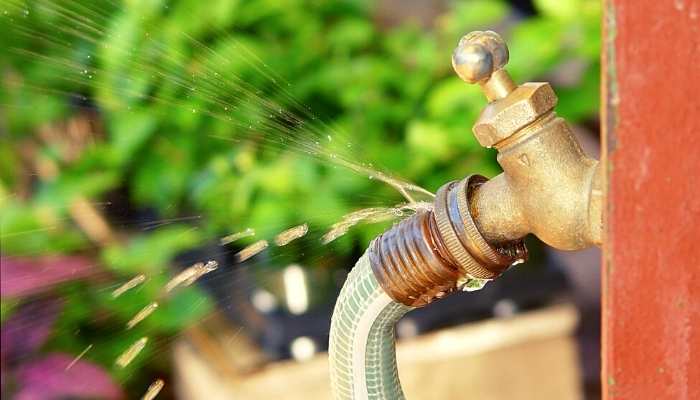
There are two circumstances you can face if you experience a faucet leak; whether you will notice continuous water dripping slowly or you might see the water seeping behind from the handle of the tap. The following steps could be a help in such a situation.
Essential Tools
- Wrench
- Plumber tape/Teflon tape
- Utility knife
Procedures
- The first thing you need to do is turn off the water supply.
- Use a wrench to tighten the nut that connects the faucet. This will fix the leak if loose packing nuts are the only issue here.
- But if the previous method doesn’t work, remove the nut. Use plumber tape to wrap the hose several times and attach that nut again.
- Make sure to tighten the nut with a wrench. You can use any other tool in case you don’t have a wrench.
- You need to remove the whole valve assembly if the water doesn’t stop seeping even after using the tape.
- Loosen the nut on the faucet and remove the valve.
- Now, wrap with Teflon tape and reinsert it by tightening the locking nut. The faucet will work well if you replace the washer.
- If you notice that the main washer has problems, you need to drain all the water from it. Open the spigot and replace the main washer.
- Insert the outdoor tap into the wall and tighten the connection properly with the connecting nut.
- Now your faucet will work perfectly without leaking any water.
Hose Connector Leak
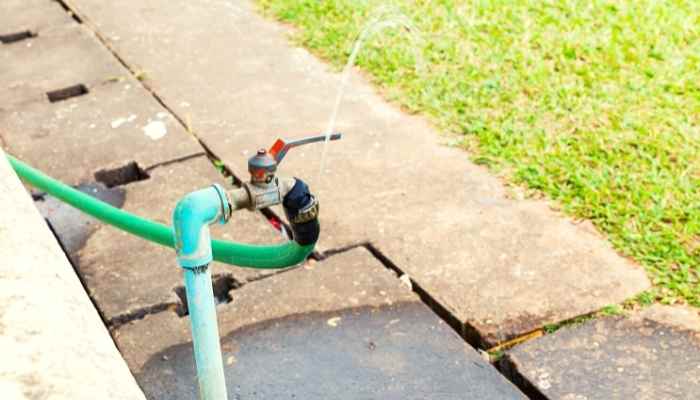
When the hose connector is loosely connected with the pipe, it may leak water. Besides, gaskets often affect the leak if they are old and have been used for too long. Whatever the reason is, the following steps might be your savior for fixing this issue.
Essential Tools
- Utility knife
- Wrench
- Screwdriver
- Plumber tape/Teflon tape
Procedures
- If there is a problem with the gasket, it is better to change it immediately.
- Sealing the gasket with an O-ring can give better protection against water leaks.
- Replacing the hose end can be a solution if the O-ring can’t help this situation. In this case, sniff off the hose end before replacing it.
- Now stick the hose barb clamp on the pipe and slip the barb into the end of the hose.
- Slide the clamp in the middle and tighten with a screwdriver or a wrench. You can use plumber tape to ensure a perfect seal.
- While you use Teflon tape/plumber tape, make sure the tape doesn’t seat cross-threaded at any point.
- Leak-proof hose fittings are a game-changer for preventing leaks from hose connectors. You can stay tension-free for a long time by using these fittings. Make sure to fit it tightly.
Maintaining Your Garden Hose
Though you can fix a hose connector pretty easily, it affects your gardening experience and makes the whole situation tough.
It is definitely better to maintain the hose well and take proper initiatives for protecting it from any damage that results in water leakage.
Protecting from Temperature Fluctuation
As discussed before, temperature fluctuation plays a vital role in creating a leak on the hose connector. The UV rays can damage your hose in summer if it remains out in the garden under the sun. On the other hand, freezing water pressurizes the connectors in the winter season that weakens the hose, and thus leak occurs.
Avoid keeping your hose outside in extreme heat or cold. You can keep them inside your house or in the garage as the garage is safe for hose storage.
Using a Hose Cart
For carrying your hose from the garage to the garden, hose carts are more than useful. Without a hose cart, the hose might get stuck in any sharp object or equipment on the way to the garden that damages the pipe and the connectors. Store your hose by coiling it into the cart using hose reels to ensure proper maintenance.
Replacing the Washer
Most of the time, the hose washer becomes the main reason for leakage, and it can’t be fixed all the time due to its design and structure. If you find any problem with the washer, don’t take time to replace it before it creates some more challenging issues that aren’t easy to deal with.
Removing Excess Water
When you store the hose for a long time, remove the excess water and dry it properly. If water remains, the connectors might get rusty and damaged. Besides, you can also separate all the attachments of the hose before storing it. This makes it more durable, and you will find it work absolutely fine after being unused for months.
Final Words
When you experience leakage, find out the exact spot on the hose connector, and follow the steps mentioned above. Now that you know how to fix leaking garden hose connector, the next time this problem occurs, you will be able to fix it quickly.